
Hello everyone! It’s been a hot minute since I have done a
full-face makeup look post on my blog. So, instead of the usual “Wednesday Wish list” post I thought I would spruce things up a bit and bring you guys a makeup look
inspired by one of the colors in the new UrbanDecay Alice through the Looking Glass Palette, the shadow in “Dream On”. It is my take on the perfect smoky eye look for
summer. During the summer season I like to incorporate pops of color wherever I
can without making a look too un-wearable.
I think this look would be great for a perfect night out with the bae,
or a late dinner with friends and families. Incorporating interesting elements
like this into a look always makes people do a double take on your eyes and it
draws people to comment, “I really like your makeup”, trust me this is a true
story. So if you want to learn how to achieve this look, then just keep
reading.


Dream On Smoky Eye:
You will want to start by prepping your eyes with a good
eyeshadow primer. My favorite to use is the UD primer potion, but any
sticky-like base will do. Many youtubers like to use MAC paint pot in soft
ochre, just be sure it’s a base that will even out the skin tone on your
eyelids. I also like to sometimes use concealer to achieve this effect. As
always stay tuned all the way to the end of the post for a complete list of all
products used and links on where to purchase.

Now lets work on building the colors in the crease first. I
like to start with the crease, as this is the part of the eye look that
requires the most blending without being too precise. This way if you need to
clean anything up it is much easier when you have only stated doing the crease.
Hopefully that makes sense, comment below if you have questions. Now for the
fun part, if you have the Urban Decay Alice Through the Looking Glass Palette
than now is the time to bust out that bad Johnny and lets get to some eyeshadow
play. Start with the color “reflection” and blend that color from the outer
corner of the crease bringing it in all the way to the inner part of the eye.
Make sure to concentrate most of the color on the outer corner. Build up the
intensity of this color as much as you want, to give the eye a lot of
definition. This peach tone brown will help bring out some of the colors we
will use as well as help transition the lid color. Once you have laid down that
color, using the shadow in “Gone Mad” build this color on top of where you
placed reflection, making sure to allow reflection to peak through at the top
of the crease. Try to concentrate the dark purple in the very center of the
crease. Blend, blend, blend this color until you have no harsh lines and the
crease looks completely blended.

Now that we pretty much laid down the foundation for the
rest of the eye look, lets work on the lid portion of the smoky look. Using a dark
crème base, I like to use the NYX jumbo pencils to achieve looks like this. For
my look I took the jumbo pencil in Black Bean, but you can use any black cream
base you like. Place this color just below the crease and all over the lid,
make sure to take a clean brush after and blend the edges of where you patted
the black cream and the crease colors. Once everything is blended with no harsh
lines, here comes the star of the show. Take the shadow in Dream On, you will
notice how glittery it is with little to slight pigmentation, and pat this
color on top of the black base. Once you have the full glitter effect and color
on the lid, take a clean fluffy brush again and make sure to blend any harsh
lines. Finish the top half of the look with the shadow “lily” on the brow bone
and inner tear duct for highlight.

The final look ends with the playful pop of color on the
bottom lash line. This is the easy part. For my look I used Anastasia Beverly
Hills waterproof crème color liner in Yellow on the water lines. Then I smoked
it out with the freedom system eyeshadow in #60 from Inglot Cosmetics. After
you have achieved the intensity you desire on the bottom lash line you can go
on to put on your foundation, bronzer, blush and highlight. Your finished look
should look like this, a beautiful glittery smoky dark purple look with a pop
of yellow.

If you enjoyed this look be sure to leave me a comment below
with your thoughts and don’t forget to follow me on Bloglovin! Also be sure to tag me in any posts you do to try to
recreate this look. I would love to see you guys rock this look or any
variations of it. As always thank you all so much for your continual love and
support here on my blog and make sure to follow me on social media for more
beauty and fashion tips! To you all I say till next time and Stay Chic
Everybody! Love you guys!! <3

Products Used:
FACE:
Foundation: L’Oreal
True Match Lumi Cushion Foundation
Powder: LM
Translucent Powder
Blush: Milani
Luminoso
Bronzer: Chanel
Soleil Tan de Chanel
Highlight: No highlight on the face in this look
EYES:
Shadows: Urban Decay
Alice Through the Looking Glass Palette
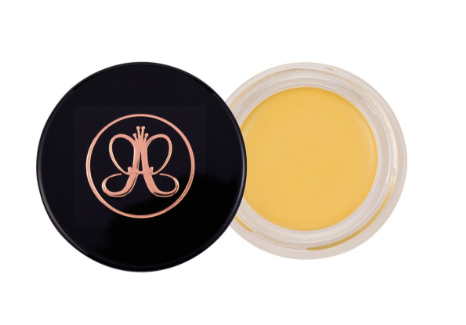
Lower Lash Line: Anastasia
Beverley Hills Waterproof crème color liner in Yellow; Inglot cosmetics single eye shadow in #60
Primer: UD primer
potion
Black Base: NYX Jumbo
Pencil in Black Bean
LIPS:
Lip Gloss: Anastasia
Beverly Hills Lip Gloss in Undressed
No lipstick or lip liner was used in the creation of this
look.

You might also be
interested in:
UD Alice Palette
Review and Swatches Video: http://twilightdelight.tumblr.com/post/146014565240/urban-decay-alice-through-the-looking-glass
L’Oreal Ture Match
Lumi Cushion Review:
No comments:
Post a Comment